I have that one kitchen drawer that was a jumble of all the less-often-used tools. Finding anything (egg slicer, ice cream scoop, can opener) was a guessing game each time I opened it.
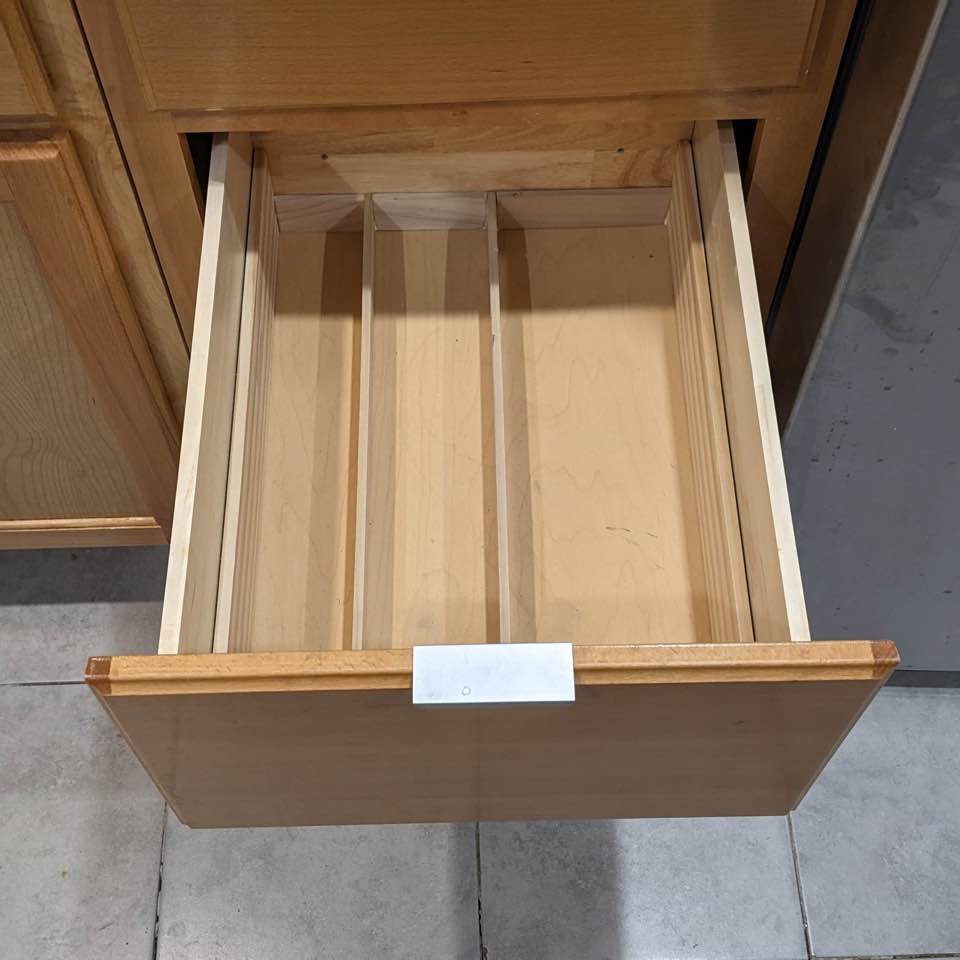
The drawer is over six inches deep, so it fills quickly with stuff. I wanted to create a double-layered storage with separators to organize my stuff. First things first: clean it out and get the internal measurements (in my case, 13 3/16" wide by 18 1/8" deep). Here's what I was working with:

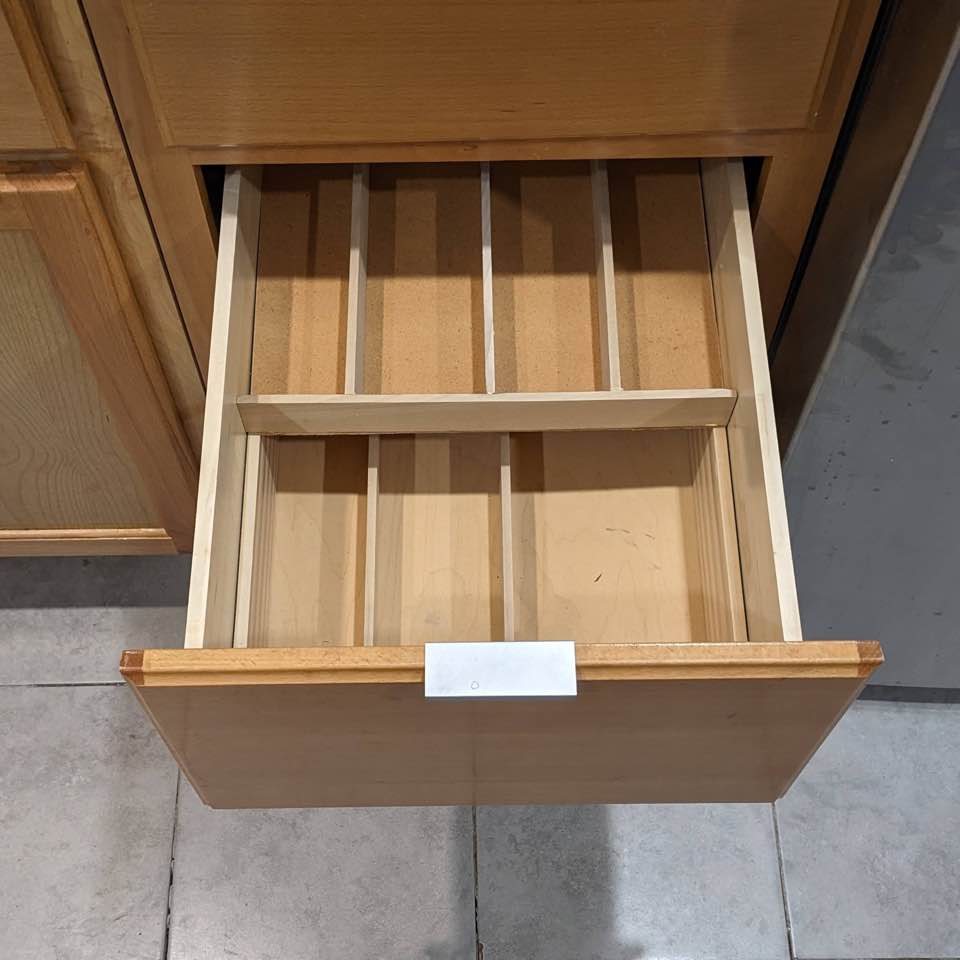
I hopped over to my local home improvement store to buy (2) slat pine boards measuring 4" x .375" x 24", and (3) slat pine boards measuring 2" x .25" x 36". With a hand saw, I cut the 3" boards to the exact depth on the inside of the drawer (18 1/8"), and used double-sided tape to attach them to the inside bottom sides of the drawer; This will be the rails that the top organizer rides on. I also cut two 2" slats to the same length, for use as interior dividers. Using the scrap 2" wood, I cut pairs of insert top & bottoms, making sure the ends were square and true. I just eyeballed the first two dividers, and after placing all the wood in the drawer, determined the final insert divider piece lengths, and cut everything to fit. After dry fitting the entire interior separators, I used wood glue to permanently keep them all together in the drawer. Allow it to dry overnight, and the bottom section is done:
You'll note, the separators are not glued to the bottom of the drawer, nor the back - only to each other, and they're held more by tension than glue. As with all (cheap store bought pre-fabbed kitchen unit) drawers, the bottoms of these are already sagging, as they're very thin paperboard with a pine wood print 'sticker' on top.
Onto the top organizer, I found a piece of firm 1/8" paperboard backing from an old frame that I could cut with a razor to fit the interior of the drawer (13 3/16" wide), and as deep as the average length of the utensils I planned on putting in it, also without covering too much of the bottom section; I chose 9" deep. Using the cut paperboard bottom it as a template, I cut the remaining 2" slats to make the top insert side separators. I didn't make side pieces, as the drawer itself would do that. Another round of wood glue on the ends and bottom to glue it to the paperboard, and the entire 'sliding' organizer sits just inside the drawer, riding on the side slats I installed first:
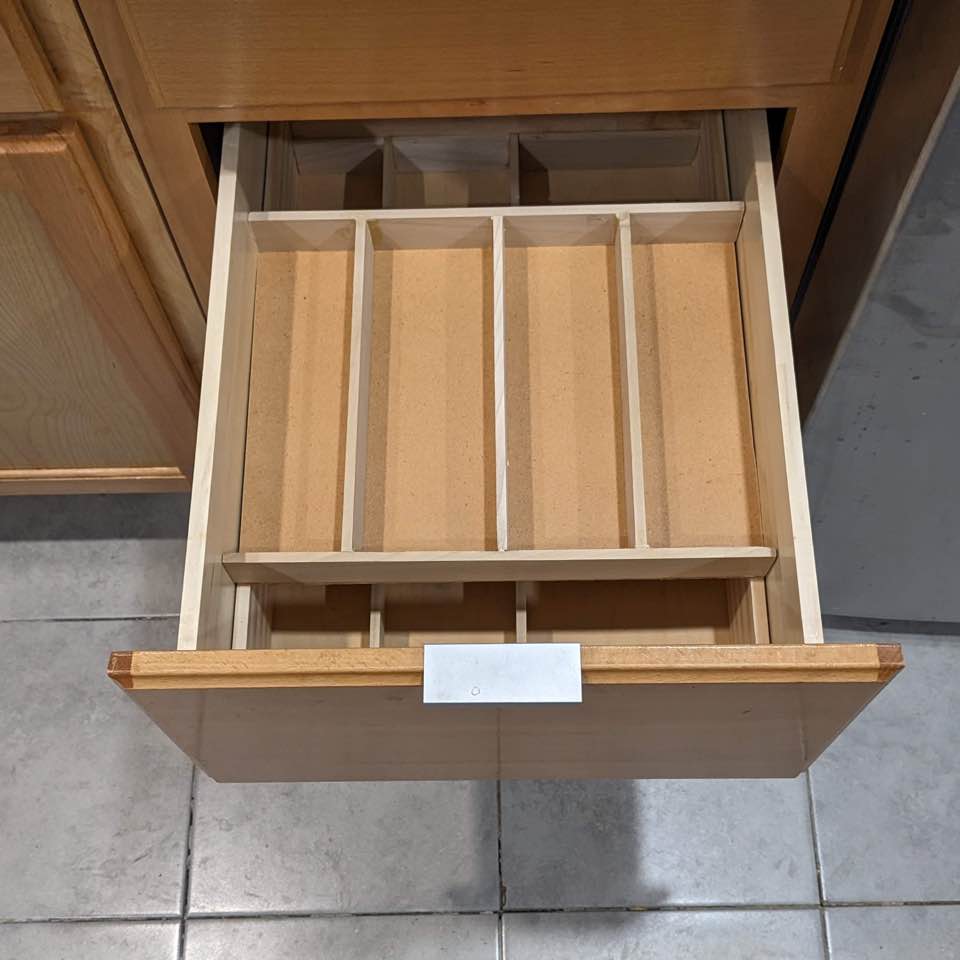
As you can see, it slides back and forth inside the drawer so I can access the lower level of storage without having to remove the upper bit. As the side slats are actually 3.5" tall, there's plenty of room underneath for rarely used utensils, like soup ladles. I've doubled the storage space!
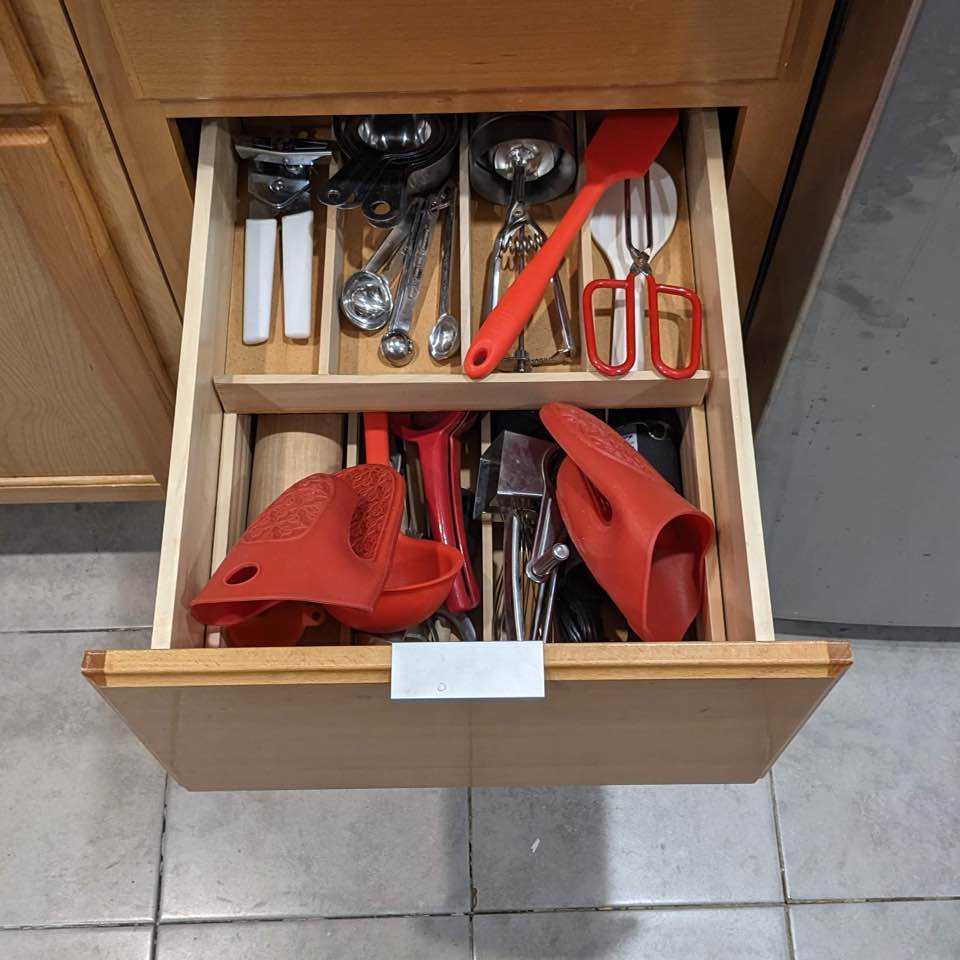
...and finally here's the finished project, full of my assorted kitchen utensils. I'm very happy with this quick project and the delightful results!